
10 Minutes To Prep: The Best Beef Cheek Meat Stew
Introduction: Can You Really Make a Hearty Stew in Just 10 Minutes of Prep?
When life gets busy, does the thought of making a comforting stew feel like an impossible dream? Most stews require hours of simmering and prep work, but what if I told you there’s a way to enjoy rich, flavorful beef cheek meat stew with just 10 minutes of hands-on prep? Using tender beef cheek meat, this recipe is perfect for anyone who craves hearty meals without sacrificing their entire evening. Let’s dive into how you can make this magic happen!
Table of Contents
Overview: Why This Recipe Is Your New Go-To
This beef cheek meat stew is special because it combines minimal effort with maximum flavor. Thanks to slow-cooking techniques or tools like pressure cookers, you’ll have more time to relax while your kitchen fills with mouthwatering aromas. Here’s why it’s worth trying:
- Time Requirement: Only 10 minutes of active prep; the rest is “set it and forget it.”
- Difficulty Level: Beginner-friendly—just chop, sear, and let it cook.
- Health Benefits: Beef cheeks are leaner than other cuts, packed with protein, collagen, and essential nutrients 7.
Whether you’re cooking for family or meal prepping for the week, this stew delivers on taste, convenience, and nutrition.
Essential Ingredients: What You Need and Why
Here’s what goes into creating the best beef cheek meat stew:
- Beef Cheek Meat (2 lbs): The star of the dish! Known for its melt-in-your-mouth texture when cooked low and slow 4. If unavailable, substitute with chuck roast.
- Flour (¼ cup): For dusting the meat to help create a crispy crust during browning.
- Olive Oil (2 tbsp): Adds richness and helps brown the meat evenly.
- Vegetables (onion, carrots, celery): These add sweetness and depth to the stew 1. Swap out veggies based on preference—parsnips or potatoes work well too!
- Garlic (3 cloves): Infuses the stew with savory goodness.
- Red Wine (1 cup): Elevates the flavor profile and tenderizes the meat further 7. Use broth as a non-alcoholic alternative.
- Tomato Paste (2 tbsp) & Broth (4 cups): Create a rich base for the stew.
- Herbs (bay leaves, thyme, rosemary): Fragrant herbs bring warmth and complexity.
- Salt & Pepper: Season generously—it’s key to unlocking all the flavors.
Each ingredient plays a role in building layers of flavor, so don’t skip any unless necessary!
Step-by-Step Instructions: From Prep to Simmer
Let’s break down the process step by step:
- Dust the Meat: Toss cubed [beef cheek meat] in flour until lightly coated. Shake off excess—it should be a thin layer.
- Tip: Don’t overcrowd the pan while browning. Work in batches for even results.
- Sear the Meat: Heat olive oil in a large pot or Dutch oven over medium-high heat. Add the floured meat and brown on all sides. Remove and set aside.
- Why sear? Searing locks in juices and builds a deep, caramelized flavor 8.
- Sauté Vegetables: In the same pot, add chopped onions, carrots, and celery. Cook for 5–7 minutes until softened. Stir in garlic for another minute.
- Deglaze the Pan: Pour in red wine, scraping up any browned bits stuck to the bottom. This adds incredible depth to the stew.
- Combine Everything: Return the beef cheek meat to the pot. Add tomato paste, broth, bay leaves, thyme, rosemary, salt, and pepper. Stir everything together.
- Simmer Slowly: Cover and reduce heat to low. Let it simmer for 2–3 hours on the stovetop, or use a pressure cooker for faster results (about 45 minutes).
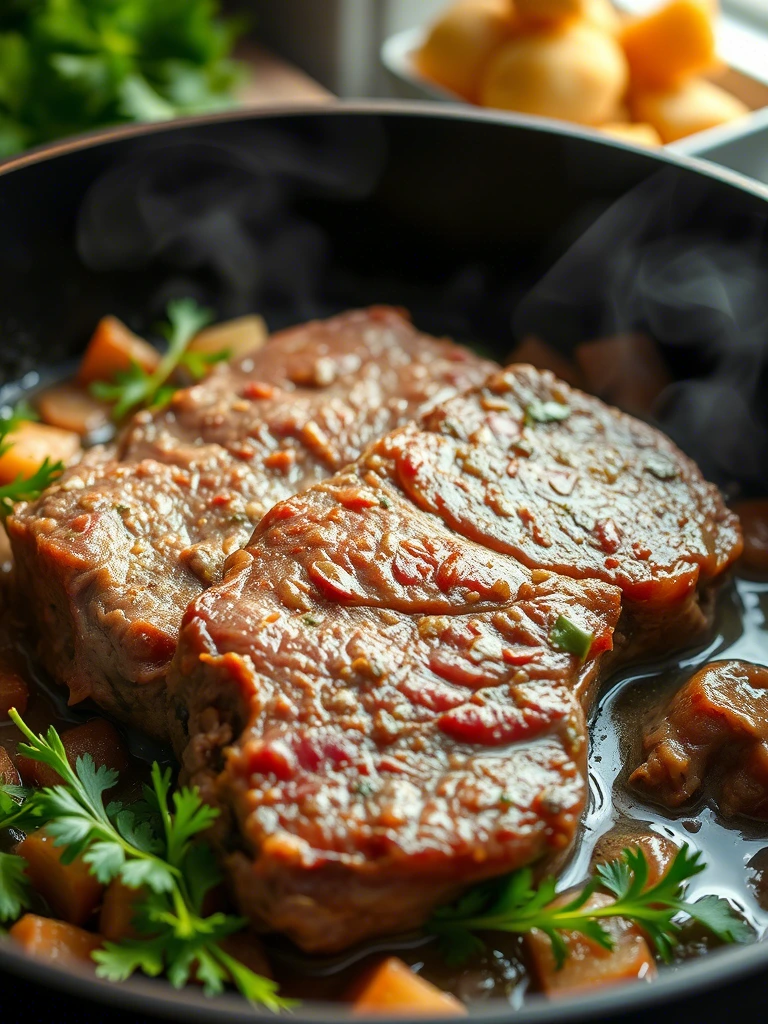
- Finish with Freshness: Before serving, remove bay leaves and garnish with fresh parsley for brightness.
Assembly: Building Layers of Flavor
The beauty of this stew lies in its simplicity. Once everything is combined, give it a gentle stir to ensure the flavors meld beautifully. Serve hot alongside creamy mashed potatoes, crusty bread, or buttered noodles for a complete meal. Garnish with fresh herbs for a pop of color that makes your dish Instagram-worthy!
Storage and Make-Ahead Tips: Save Time Later
One of the best things about this stew is how well it stores:
- Refrigeration: Cool completely before transferring to an airtight container. It will keep for up to 4 days in the fridge.
- Freezing: Freeze portions in freezer-safe bags for up to 3 months. Label with dates for easy tracking.
- Reheating: Thaw frozen stew overnight in the fridge, then reheat gently on the stovetop or microwave. Add a splash of broth if needed to loosen the consistency.
Pro tip: The flavors intensify after a day or two, so leftovers often taste even better!
Recipe Variations: Get Creative
Feel free to experiment with these ideas:
- Spices: Add smoked paprika, cumin, or chili flakes for a kick.
- Veggies: Incorporate mushrooms, turnips, or sweet potatoes for variety.
- Liquid Base: Swap red wine with beef stock or Guinness stout for a different twist.
- Global Flavors: Transform it into Asian-inspired stew with soy sauce, ginger, and star anise.
Conclusion: Your Next Comfort Food Adventure Awaits
There’s nothing quite like a bowl of warm, hearty stew to comfort both body and soul. With just 10 minutes of prep, this [beef cheek meat] stew proves that delicious meals don’t have to be complicated. So grab your ingredients, roll up your sleeves, and get ready to savor every spoonful. Experiment with flavors, share with loved ones, and most importantly—enjoy!
FAQs: Everything You Need to Know About Beef Cheek Meat Stew
Q: Are beef cheeks tough? How do they become tender? A: Raw beef cheeks can seem tough, but they contain connective tissue that breaks down beautifully during slow cooking, resulting in fork-tender meat 7.
Q: Can I use a slow cooker instead of a stovetop? A: Absolutely! After searing the meat and sautéing the veggies, transfer everything to a slow cooker and cook on low for 6–8 hours.
Q: Is this recipe healthy? A: Yes! Beef cheeks are rich in collagen and lower in fat compared to other cuts, making them a nutritious choice 4.
Q: What sides pair well with this stew? A: Creamy mashed potatoes, rice, or crusty bread are classic options. For a lighter option, try steamed greens or a side salad.
Now that you know all about this amazing stew, it’s time to roll up your sleeves and start cooking. Happy stewing!